Prerequisite
There are a couple of assumptions that this article makes before diving into the main process of domain verification. The obvious of them is you need to own a domain, if you do not have one you can purchase one from Namecheap or other hosts. Second assumption is that you also have an aws account, that can easily be set up. Let's jump right into it.
Purpose and Importance of CNAME record.
A CNAME(Canonical Name) is a type of DNS record that enables you to point a domain name or a subdomain to another domain or subdomain. For example you might have your blog on yourblog.yourdomain.com point to your content hosting provider on yourprovider.com. So in essence a CNAME record provides domain redirection among other things. A CNAME record also helps in a number of instances such as subdomain for email marketing service, load balancing, content redirection, porting to a different hosting provider etc.
Setting up AWS SES domain verification.
As mentioned earlier you'll need to have already purchased a domain from a hosting provider. You'll also need to have an AWS account. Assuming you've gotten them in place we can proceed by signing in to our AWS console and searching for AWS SES:

Click on Amazon Simple Email Service

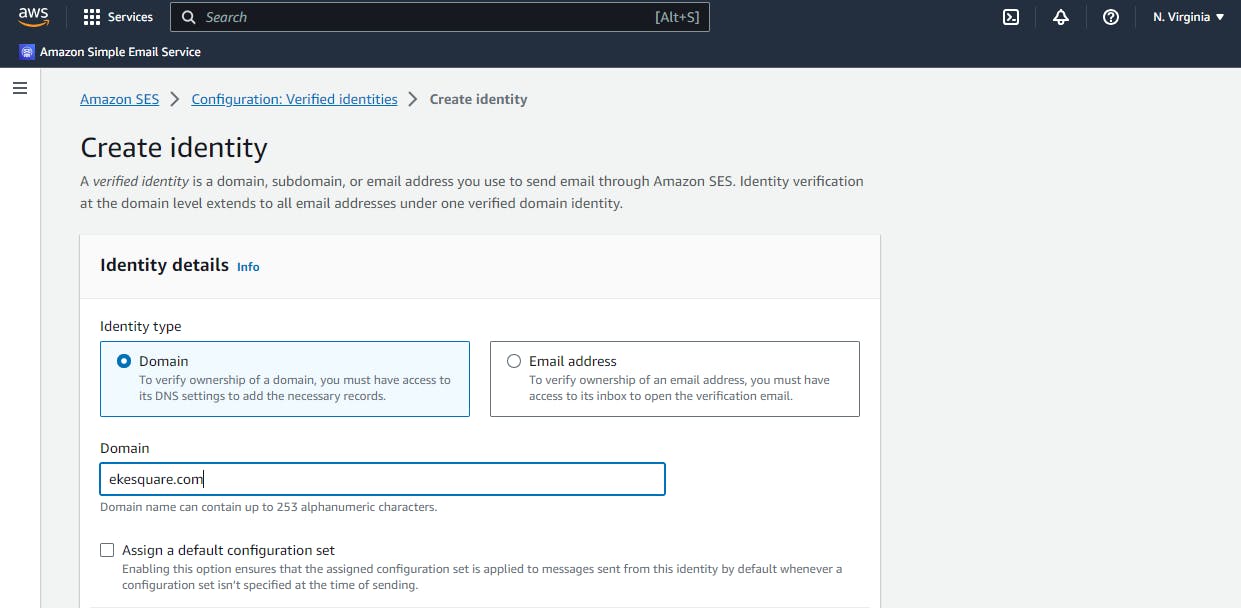
Put in your domain you want to verify and click on create identity.

You're then redirected to this page that contains the CNAME configuration to be added to your DNS provider. In our case it is namecheap. Copy the 3 values presented to you on the configuration page into a text file.
Adding AWS SES CNAME to namecheap
Now head over to your DNS provider, Namecheap in this case. Login and navigate to the Dashboard section which would list out all domains you have purchased.

- Click on Manage found beside the domain expiration date and select the Advanced DNS tab. You'll get a screen similar to the one below, this is where the CNAME configuration takes place.

Under the Host Record click on Add New Record and select CNAME Record. Put each of the values copied from the AWS SES configuration page. While pasting the values omit the part that contains the domain, for example given a host lt2uqtm4bdzlc5vlu7fpg6jcb5rkn._domainkey.example.com while pasting the record leave out the example.com part and just paste this part lt2uqtm4bdzlc5vlu7fpg6jcb5rkn._domainkey. It's an important piece that could delay your domain verification. On completion head over to your AWS SES account dashboard, verification should be completed in a shortime, sometimes around 30 minutes.
Conclusion
In conclusion this post has demonstrated how we can go about verifying a domain purchased from namecheap while setting up AWS SES.
